> ## Documentation Index
> Fetch the complete documentation index at: https://docs.gbox.ai/llms.txt
> Use this file to discover all available pages before exploring further.
# Register Local Device
This guide explains how to register your local Android device with GBOX for local testing and development.
## Prerequisites
Before proceeding, ensure you have:
* An Android device with developer options enabled
* A Mac computer
* USB cable for device connection
* Active internet connection
## Step-by-Step Registration Process
> **Note**: If your local device is created by Android Studio, you should skip this step 1-3.
### 1. Enable Developer Options on Android Device
> **Reference**: For detailed instructions, refer to the [Pixel Developer Options Guide](https://developer.android.com/studio/debug/dev-options) and [Samsung Developer Options Guide](https://developer.samsung.com/health/android/data/guide/dev-mode.html).
### 2. Configure Device Settings
To ensure optimal performance during testing:
* Disable **Auto screen timeout**
* Disable **Auto lock screen**
* Keep the device screen on during testing sessions
### 3. Connect Device to Mac
1. Connect your Android device to your Mac using a USB cable
2. On your Android device, allow **USB debugging** when prompted
3. Ensure the device is recognized by your Mac
### 4. Install and Configure GBOX CLI
Open Terminal on your Mac and execute the following commands:
```bash theme={null}
# Install GBOX CLI
brew install gbox
# Update GBOX if already installed
brew update && brew upgrade gbox
# Login to GBOX.cloud (GitHub authorization required)
gbox login
# Register local device to GBOX.AI
gbox device-connect
```
### 5. Install GBOXKeyboard (Required)
Your device may prompt you to install **GBOXKeyboard** - this is essential for Agent input operations. Please install it when prompted.
### 6. Verify Device Connection
After successful registration, you should see your connected device in the device list:
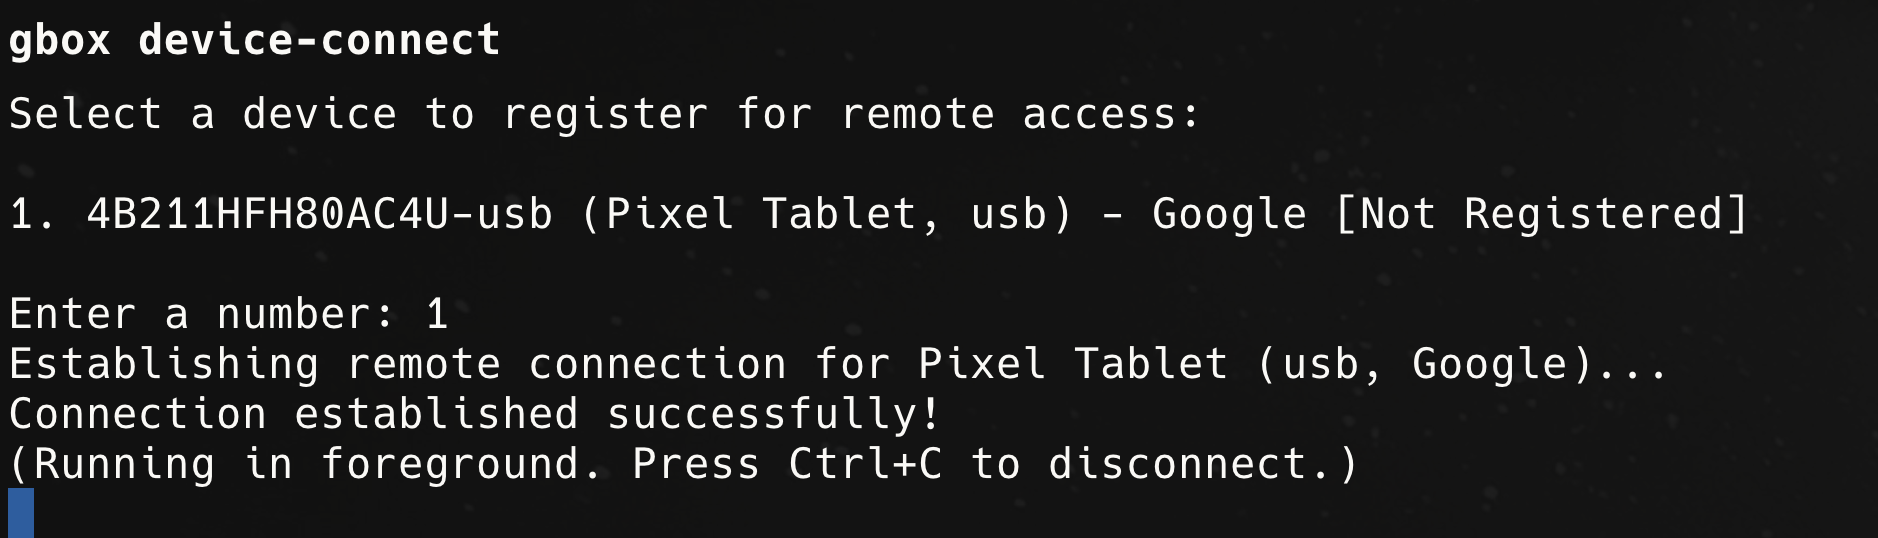 You can also see the registered devices in the [GBOX Dashboard](https://gbox.ai/dashboard):
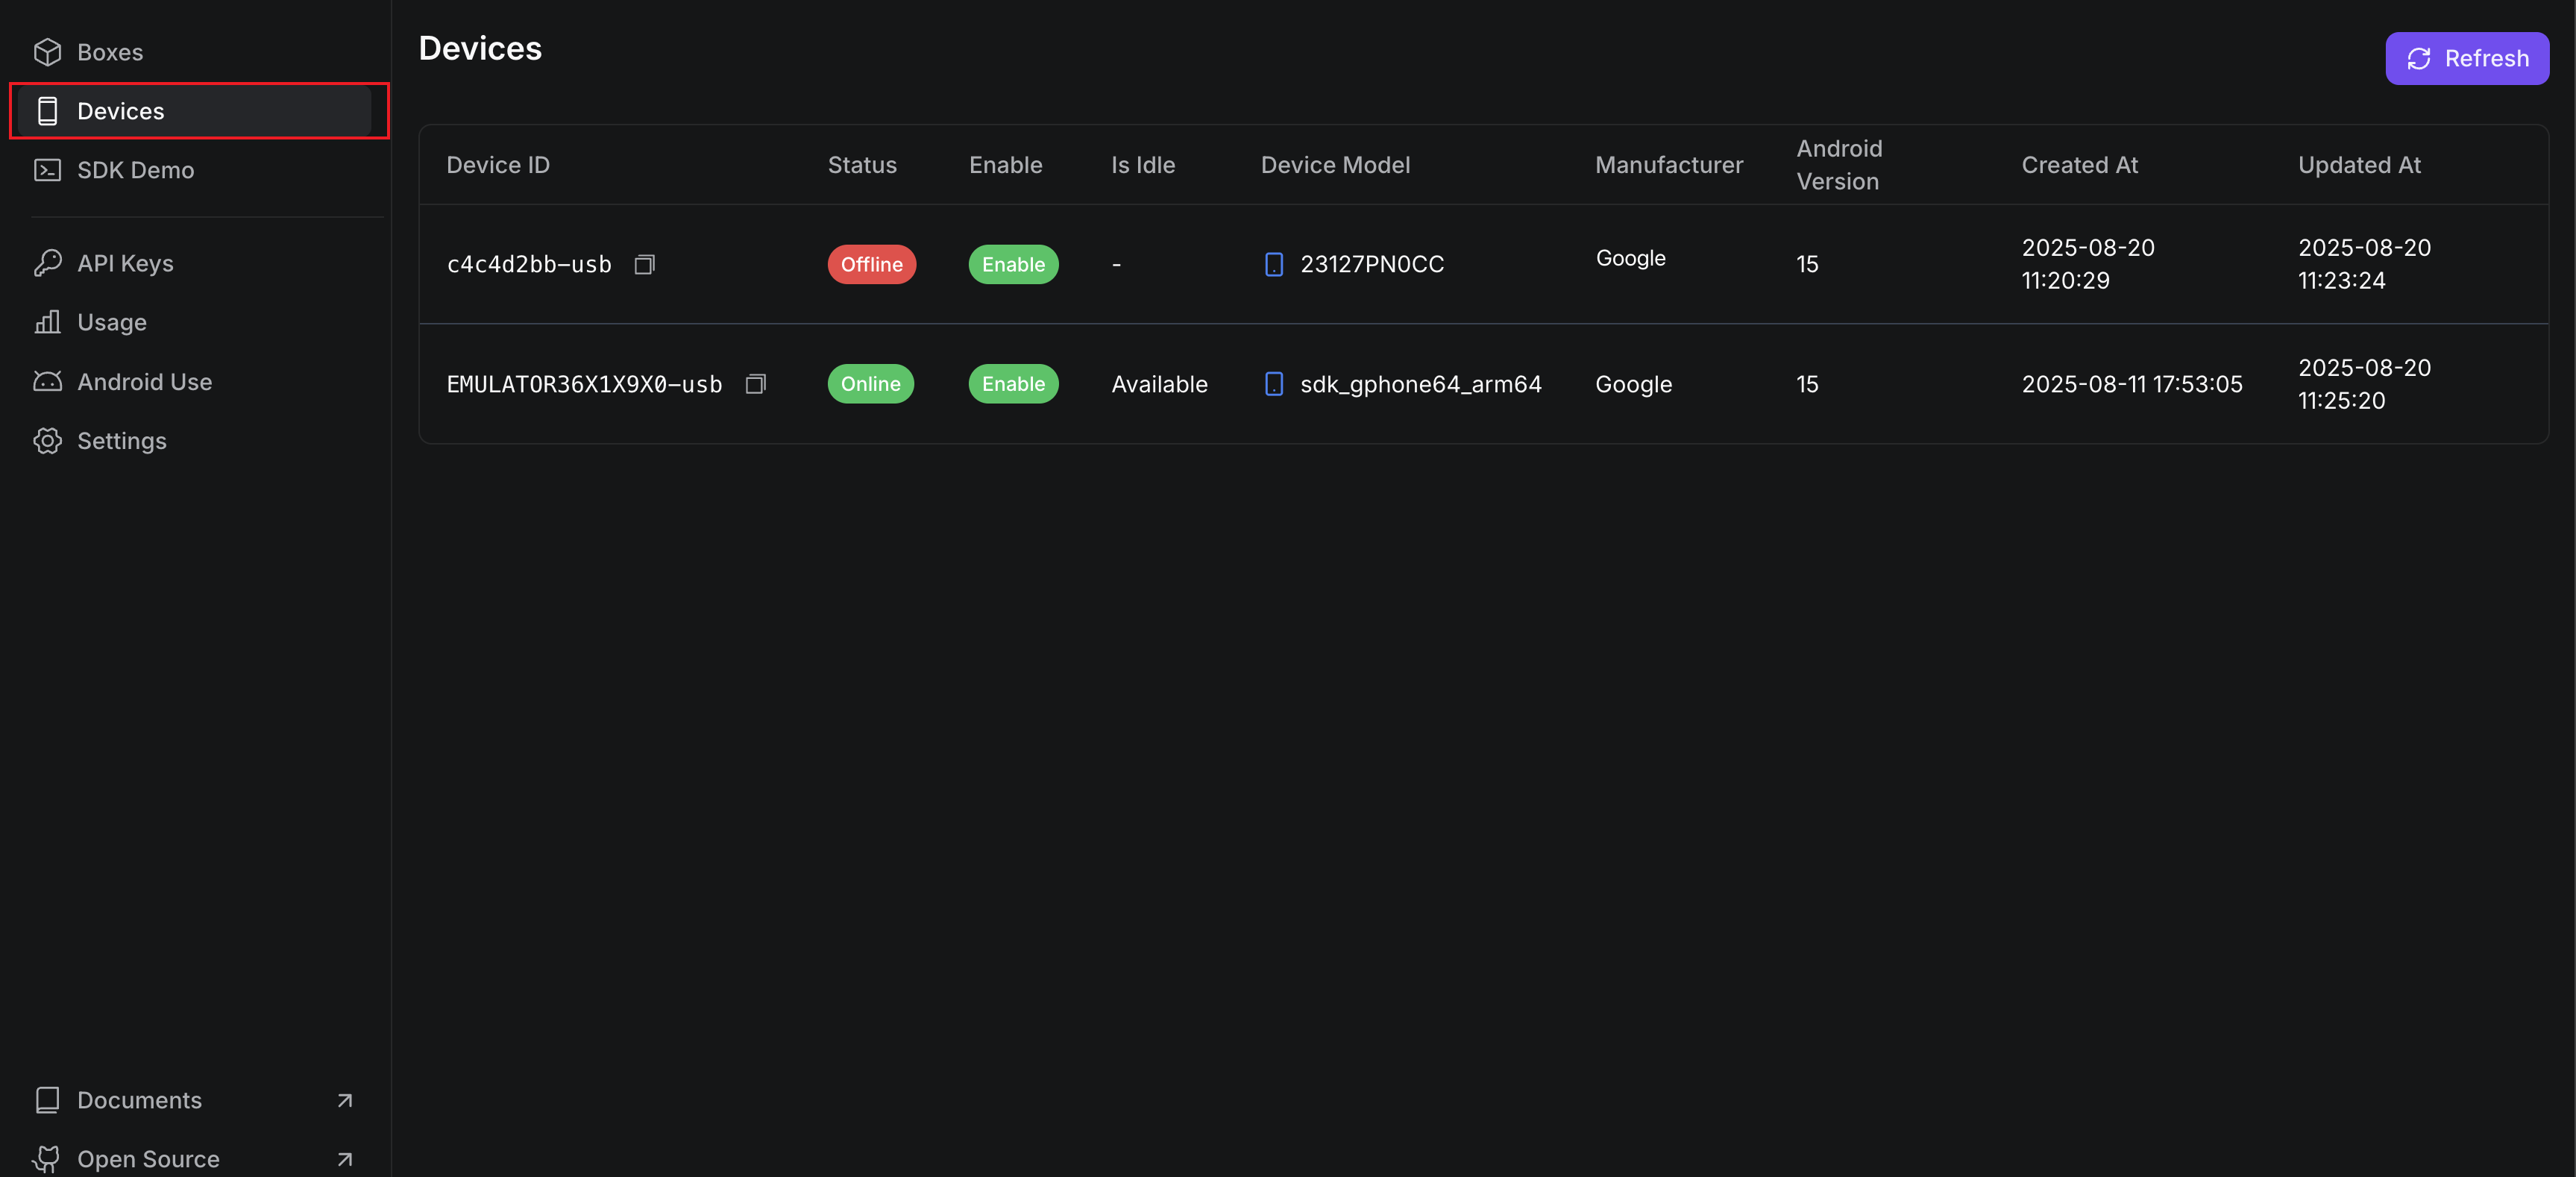 > **Note**: You may see the newly registered device status is "Offliine", this maybe caused by some initialize work still in progress. Waitfor a few minutes and it should be changed to "Online". Or try to register the device again.
## Troubleshooting
### Connection Issues
* Ensure USB debugging is enabled
* Try different USB cables
* Restart both device and Mac if needed
### Performance Note
> **Note**: Due to our servers being located in the United States, users in other locations may experience some latency during operations.
## Next Steps
Once your device is successfully registered, you can:
* Run automated tests
* Execute UI actions
* Debug applications
* Perform device automation tasks
For more information on using your registered device, refer to the [Android Basic Guide](/android/basic) and [Real Device Testing](/android/real-device) documentation.
> **Note**: You may see the newly registered device status is "Offliine", this maybe caused by some initialize work still in progress. Waitfor a few minutes and it should be changed to "Online". Or try to register the device again.
## Troubleshooting
### Connection Issues
* Ensure USB debugging is enabled
* Try different USB cables
* Restart both device and Mac if needed
### Performance Note
> **Note**: Due to our servers being located in the United States, users in other locations may experience some latency during operations.
## Next Steps
Once your device is successfully registered, you can:
* Run automated tests
* Execute UI actions
* Debug applications
* Perform device automation tasks
For more information on using your registered device, refer to the [Android Basic Guide](/android/basic) and [Real Device Testing](/android/real-device) documentation.